Welcome to our detailed guide on using UDIO, an AI-powered application designed to help you create and expand music samples effortlessly. This step-by-step tutorial will walk you through everything you need to know to get the most out of UDIO.
UDIO is an innovative tool that leverages artificial intelligence to assist you in generating music samples based on your preferences. In this guide, we will cover how to input prompts, configure settings, generate samples, and refine your music creations.
1. Inputting a Text Prompt
Step 1: Enter Your Prompt
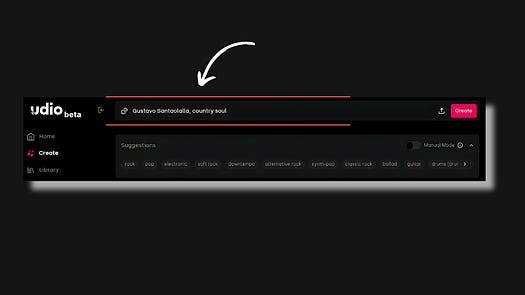
At the start of your session, you’ll input a text prompt specifying the music style or artist you want to use as a reference.
For instance, type in “Gustavo Santaolalla, country soul” to instruct the system to generate two 32-second samples based on this style.
After entering the prompt, the system will process your request and create the samples.
2. Configuring Initial Options
Step 2: Set Up Initial Parameters
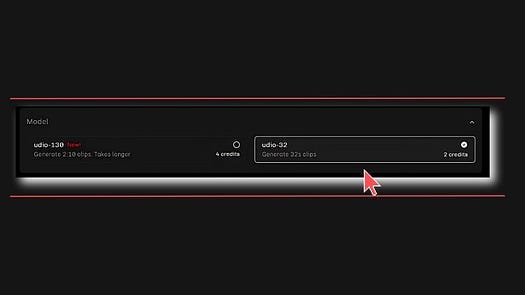
Before submitting your request, you need to configure some initial settings. This involves selecting the appropriate model:
UDIO-32: Consumes 2 credits per request and generates samples of 32 seconds.
UDIO-130: Consumes 4 credits per request and provides samples of 2 minutes and 10 seconds.
For credit efficiency, I typically choose the UDIO-32 model.
3. Exploring and Setting Advanced Options
Step 3: Adjust Advanced Settings
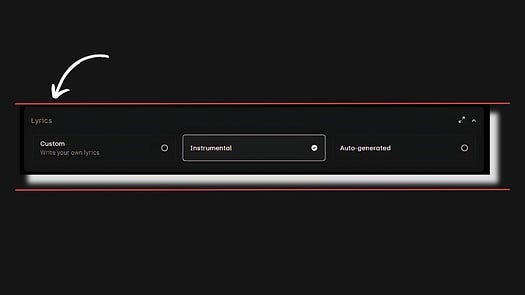
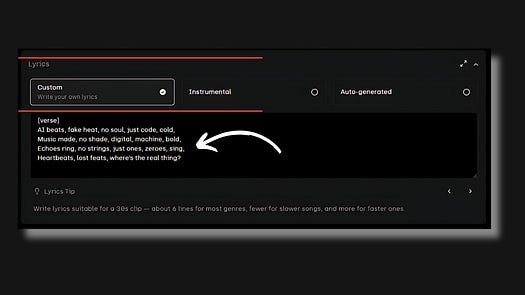
Navigate to the lyrics menu where you can choose from:
Custom: Allows for personalized lyrics.
Instrumental: Generates an instrumental sample.
Auto-generated: The system automatically creates lyrics.
Explore the Advanced Features menu to adjust:
Prompt Strength: Dictates how closely the system adheres to the specified style.
Lyrics Strength: Controls the level of creativity applied to the lyrics.
4. Adjusting Quality and Context Settings
Step 4: Fine-Tune Settings
Configure additional parameters:
Timing: Adjusts synchronization of the samples.
Clarity: Enhances the sound clarity.
Context Length: Determines how much of the existing track the model uses when generating new content.
Set Quality to “ultra” for the best results.
5. Submitting the Request and Waiting for Samples
Step 5: Submit Your Request
Once all settings are configured, submit your request to the system.
Within approximately 30 seconds, you will receive two 32-second samples.
Note that credits will be deducted for each request made.
6. Exploring Previous Creations and Testing New Prompts
Step 6: Explore and Experiment
While waiting for additional samples, browse through previous creations.
Test various prompts to see different results. For example, entering artist names like your favorite bands and musicians may lead the system to use the music style instead if it doesn’t have specific artist rights.
7. Expanding Samples and Adding Lyrics
Step 7: Develop Your Samples
Once you find a sample you like, begin expanding it. You can add lyrics, verses, stanzas, and choruses.
Modify the prompt if you wish to introduce new styles or elements.
8. Refining and Finalizing the Music Creation
Step 8: Final Touches
Continue refining your music by adding elements such as choruses and adjusting your prompts.
Complete your track after experimenting with multiple prompts and expanding samples.
Final Result:
By following this comprehensive guide, you are now equipped with the knowledge to effectively use UDIO for music creation. Explore, experiment, and expand your musical ideas with confidence. For a taste of what you can achieve, check out the final version of the track I created by clicking the link or the thumbnail above — “The Soundtrack”.
Full Educational Video:
Happy creating!
André


